Day three is devoted entirely to hand shaping the front and rear legs. The day begins with a practice front leg. Shaping with hand tools is often a new process for students and I like them to try the techniques and tools on practice stock before working on their actual chair parts. This is the first time Mark or David have used a drawknife.

Although the front legs can easily be turned on a lathe I have students shape these parts from square stock using a drawknife, spokeshave and card scraper. This prepares them for hand shaping the more difficult rear legs which must be done with hand tools. The first and most important step is to take the square stock and shape it to an octagon. The octagon establishes the geometry of the shape and the facets are large enough to judge if they are all identical. After laying out the facets on the square leg blank, a drawknife is used to remove most of the material, followed by a spokeshave to finish and fine tune each facet right to the layout line. Here are a pair of David’s front legs that have been shaped to a tapered octagon.
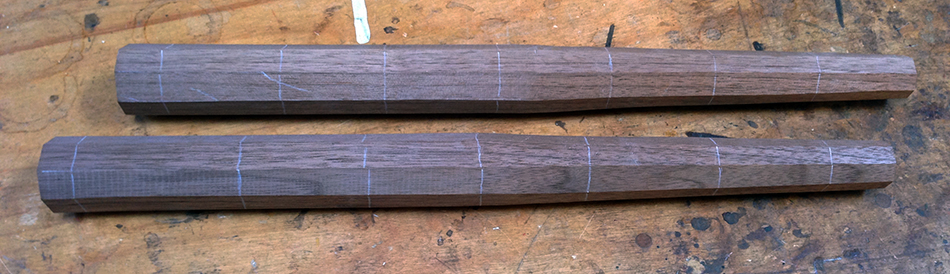
In the next step I have students shape the leg from 8 sides to 16 sides. At this point it often becomes difficult to see and maintain the individual facets. To help with this I have students draw lines around the circumference of the legs every 3 or 4 inches or so as shown above. Now when you knock off a corner of the octagon a gap appears in this line leaving a dash on the uncut part of the original facet. When the gaps and dashes are equal you will have a leg with 16 equal sides as shown below. It’s an excellent and easy way to see what is happening. From here it’s a simple matter of taking the legs to 32 sides and finally to round.

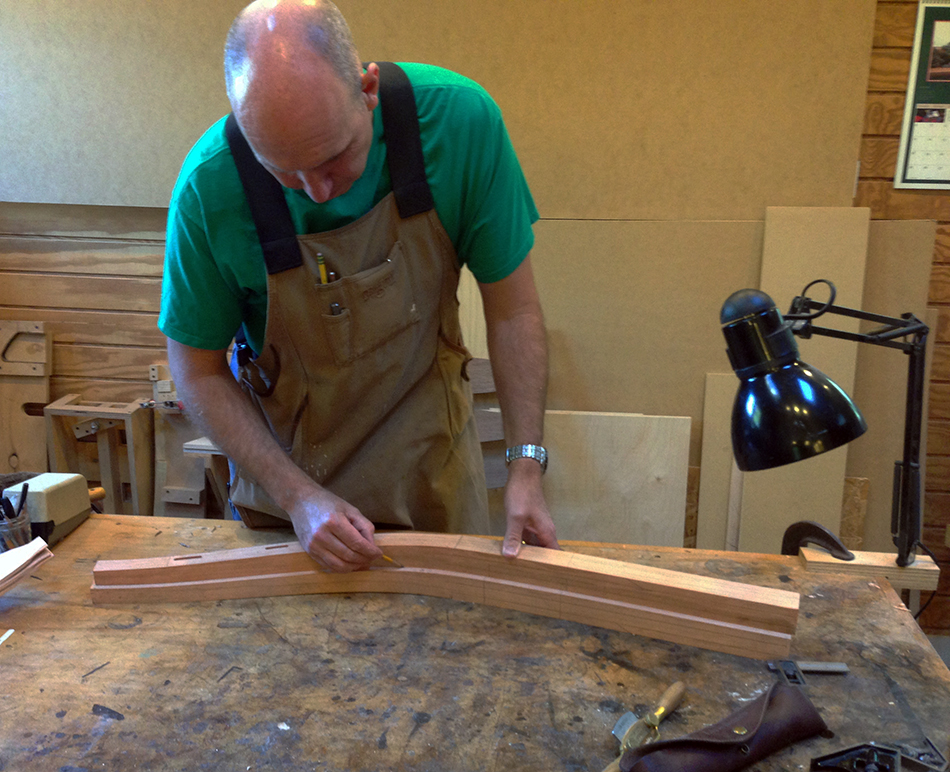
The practice front leg took most of the morning and the two actual front legs took the better part of the afternoon. Towards the end of the day David and Mark are ready to start shaping the rear legs. The process begins with laying out the facets in order to shape the leg to an octagon. Here Mark is laying out the curved, tapered facet on the side of a rear leg using the other rear leg as template.
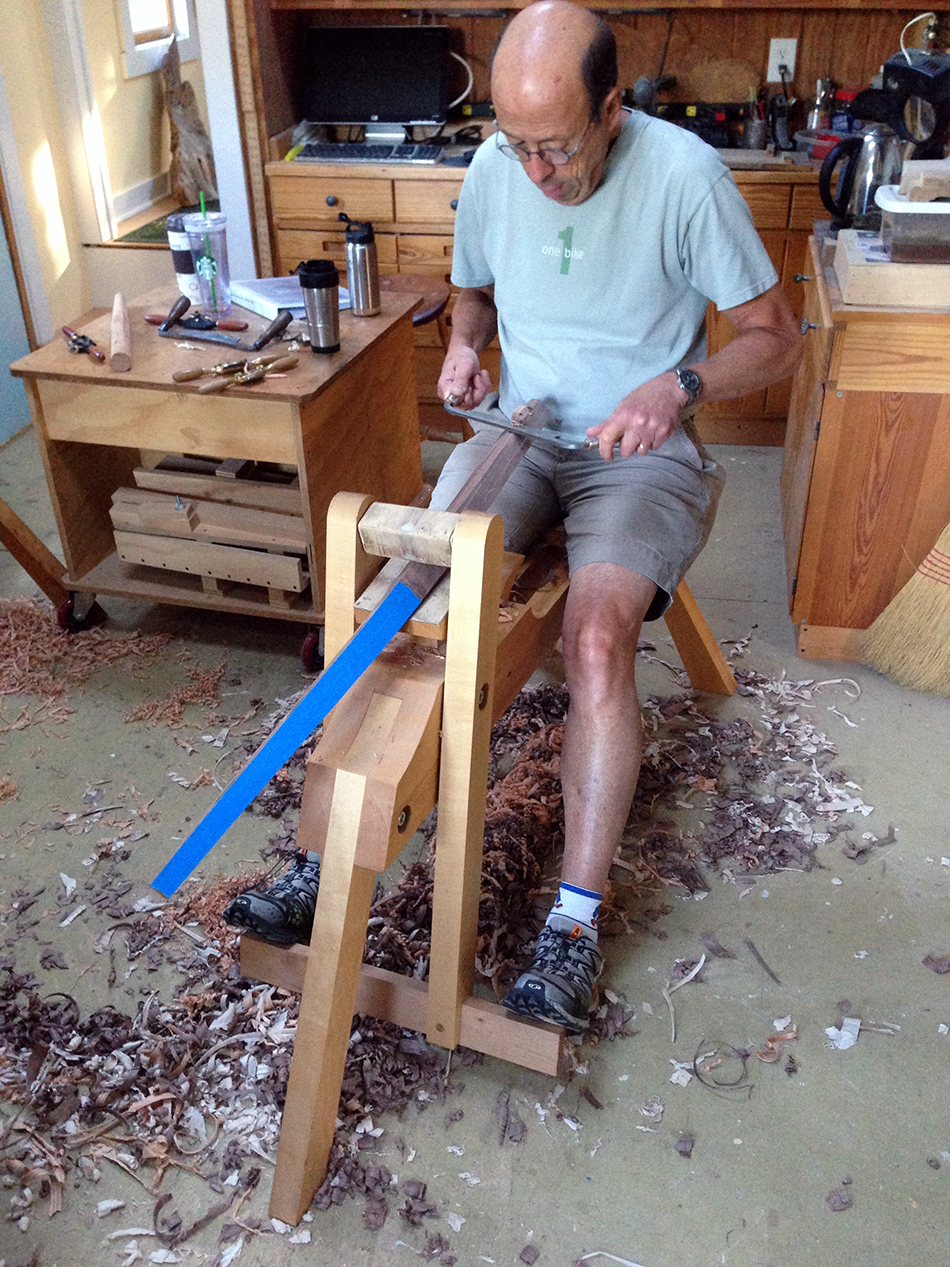
And here is David beginning to shape one of his rear legs using a drawknife. The blue tape you see is on the top, front face of the leg. From the seat level up only the back of the leg gets shaped to half round. The front face should remain flat, so I have students cover the front face and it’s edges with blue tape to discourage them from cutting into those edges.
By the end of the day both front legs are shaped and David and Mark have begun shaping the rear legs. Here are the chair parts so far. The only parts missing are the rungs—the rung stock, already shaped to an octagon on a band saw, has been drying in a small light bulb kiln for about a week.

Tomorrow we will finish shaping the rear legs, turn the rungs, drill the front and rear rung mortises, and begin assembly.