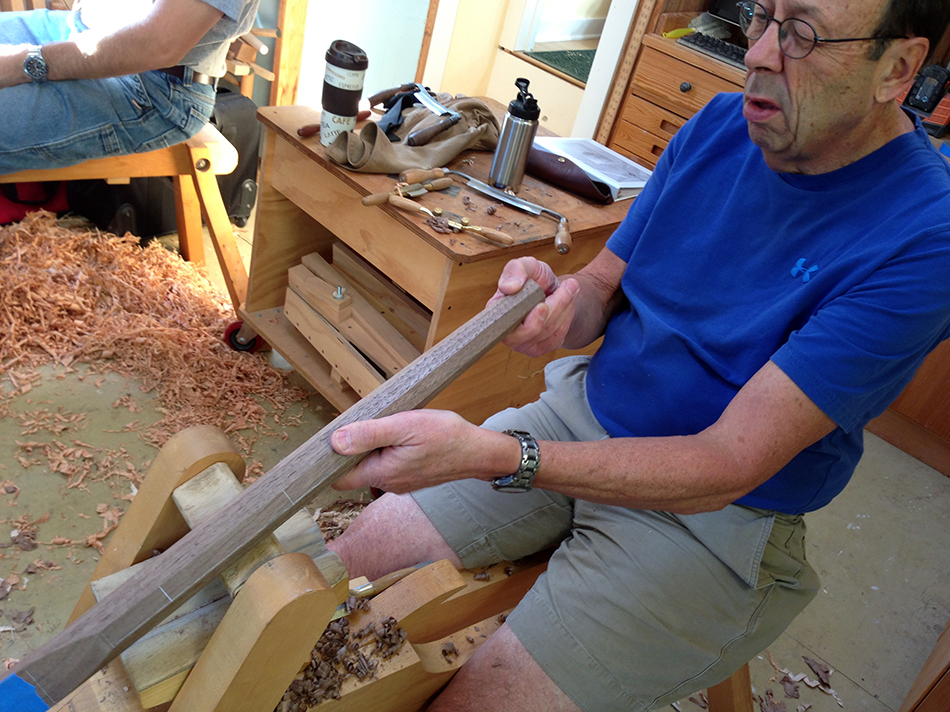
On day four we continue shaping the rear legs using the same process as the front legs but with the added complexity of a curved part. Here David has shaped the bottom of the rear leg to a tapered octagon and is checking his work.
While David and Mark are working on the rear legs I turn the rungs. I always show students how to turn the rungs and they have an opportunity to practice, but there is not enough time during class for students to turn their own rungs. Prior to turning, the rung stock has been shaped to an octagon using a simple band saw jig. Then, about a week ahead of time the prepped stock is put in a small light bulb kiln to get the moisture content down to about 4% or so. The rungs are turned in this bone dry state so that the tenons, which are turned precisely to .625″ (5/8″), will fit the mortises exactly at the time of assembly, and over time swell within the mortise as they reach equilibrium moisture content. The moisture content of the tenon and it’s mating mortise is one component in making a lasting joint. After turning, the rungs are returned to the kiln until needed for assembly.

By very early afternoon Mark and David have completed shaping the legs.
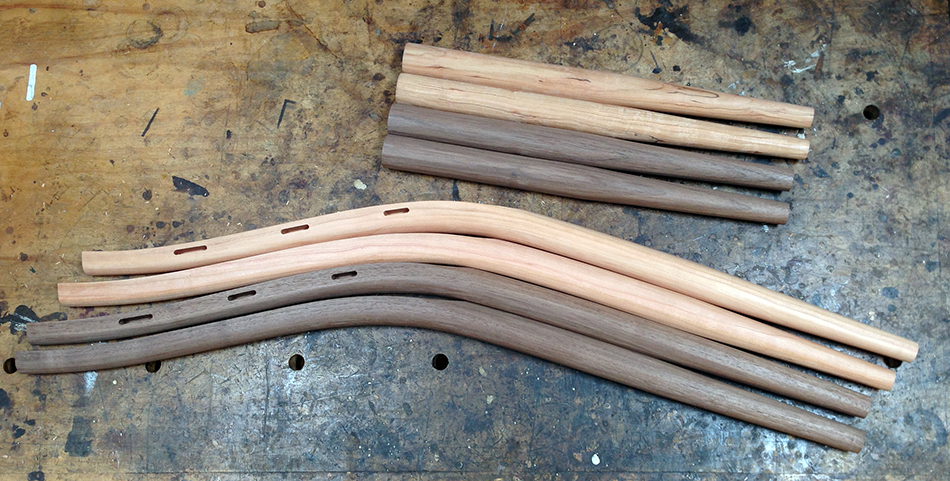
The next step is to finish shape the slats. This involves fairing out the top and bottom curves between the tenons and adding a bevel to the inside face at the top of the slat.

Now that all the parts are shaped its time to start drilling the rung mortises. Here David is drilling mortises into the front legs for the front rungs. The jig is raised at one end to account for the side-to-side splay of the legs. The other important consideration is grain orientation, which is another component in making a lasting joint. In this case we want the growth rings in the leg to be 45° relative to the long grain of the rung so we simply rotate the legs in the jig to that orientation.

Drilling the rear rung mortises into the rear legs introduces an additional problem. First we have to account for the side-to-side splay of the legs by raising one end of the jig. Next we have to rotate the legs so that, at assembly, the rungs will be parallel with the slats. To achieve this we rotate the legs in unison until the slat is perfectly vertical as verified by sighting down the framing square. Then we check the rotation again with the slat in the opposite leg. If there is any difference in the vertical aspect of the slat in each leg, we split the difference with one slat being off vertical at the top and the other off vertical an equal amount at the bottom. Once that is done we lock the legs in place and are ready to drill.

Here David is drilling the rung mortises into his rear legs.

The last thing we do today is assemble the front panel. We use hide glue because of it’s unique ability to reactivate upon exposure to heat and moisture. Because the fit of the tenon to the mortise is very precise most glue applied during assembly will shear off compromising the glue bond of the mating parts. Applying hide glue is done in two steps. The first step is to apply a very thin coat to the mortise and to the tenon and let this dry completely. This is called a sizing coat. The sizing coat covers the surface and seeps into the wood. At assembly a second, heavier coat of hide glue is applied. The second coat reactivates the sizing coat and also provides lubrication for the assembly process. Most of the second coat is sheared off during assembly but it still does it’s job by activating the sizing coat on both parts which then are able to form a very good glue bond. This jig uses wedges to provide even clamping pressure along the barrel of the legs. We will use this jig throughout the assembly process, changing wedges to match specific parts.

By the end of day four the front panel is assembled, the rear legs and slats have been shaped and the rungs are turned. For this photo the rear panels have been dry fit together. The blue tape on the rungs helps us orient the grain correctly during assembly.

Tomorrow Mark and David will shape the ears at the top of the front legs, drill the side rung mortises into the front panel and rear legs, trim and shape the top of the front legs, completely assemble the chair, and pin the slats.