In the last post I measured for the top slat, laid out the tenons and the shape of the main body, and sawed the slat out on the band saw. Now I’m ready to fit the slat tenons to the mortises. I use a simple, but methodical process to fit each tenon precisely to it’s mortise with the goal of having the slat fit perfectly the first time I put it into the mortise.
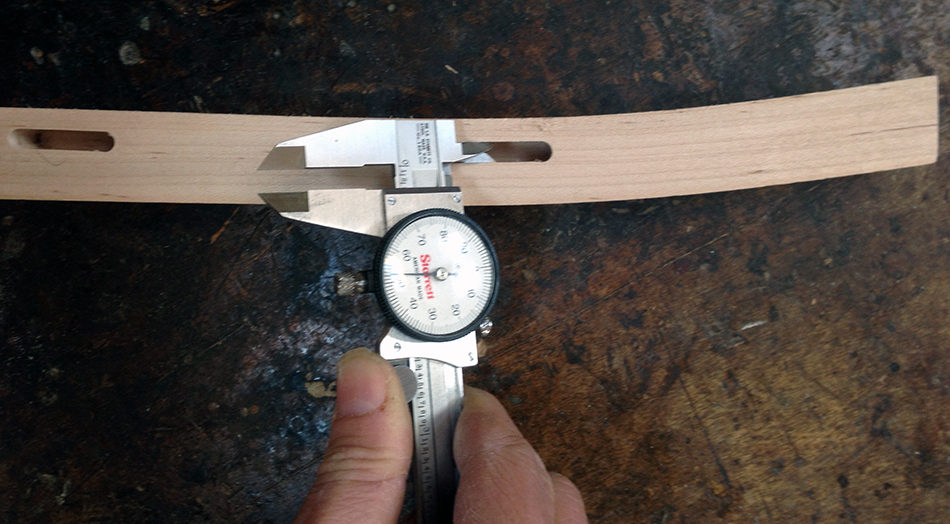
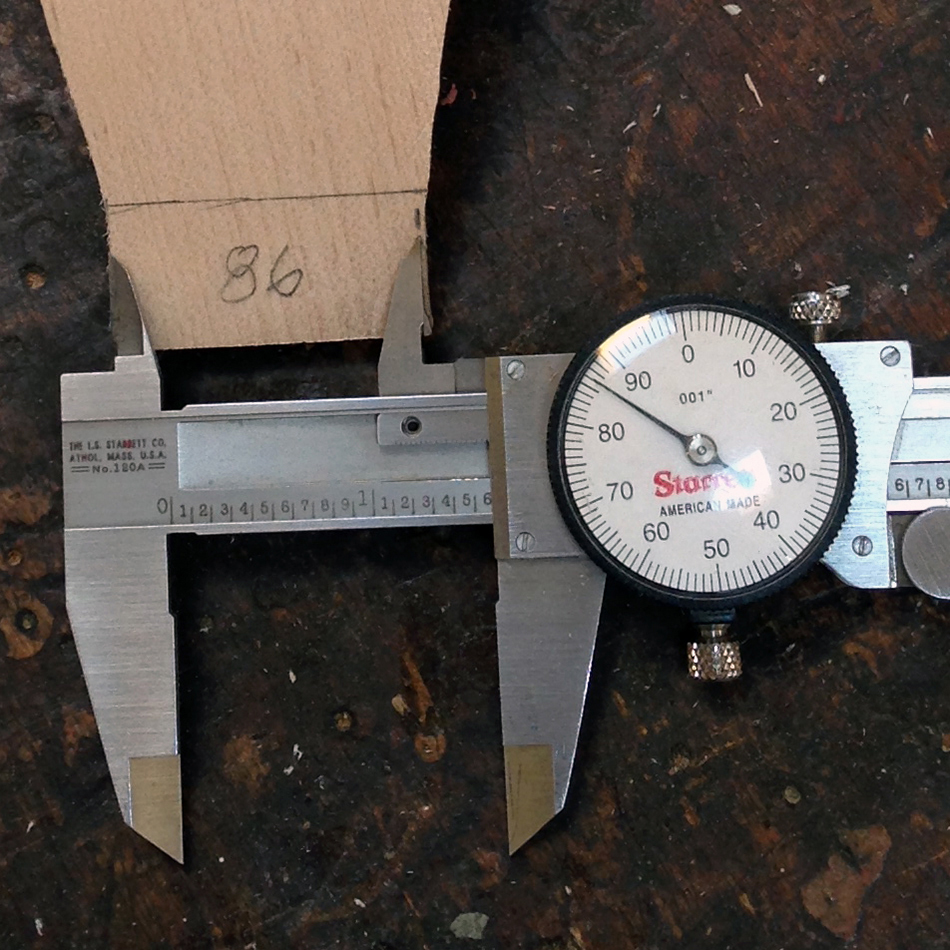
I always fit the top slat first before moving onto the others. The first step is to scrape the slat on both sides to remove any rough surface left behind from steam bending. This leaves a smooth surface, especially on the slat tenons where I want to precisely fit the thickness of the slat to the width of the mortise. Every tenon has it’s own mortise and I’m very careful to always put the tenon only into it’s mating mortise. Using a dial caliper that measures in thousandths, I begin by measuring the width of the mortise I am fitting to. Although I cut these mortises with a 1/4″ router bit (.250″) it’s possible there will be slight variations in the width of each mortise. This mortise measures .252″ at it’s widest point.
Next I measure the thickness of the tenon to get an idea of how much material I need to remove.
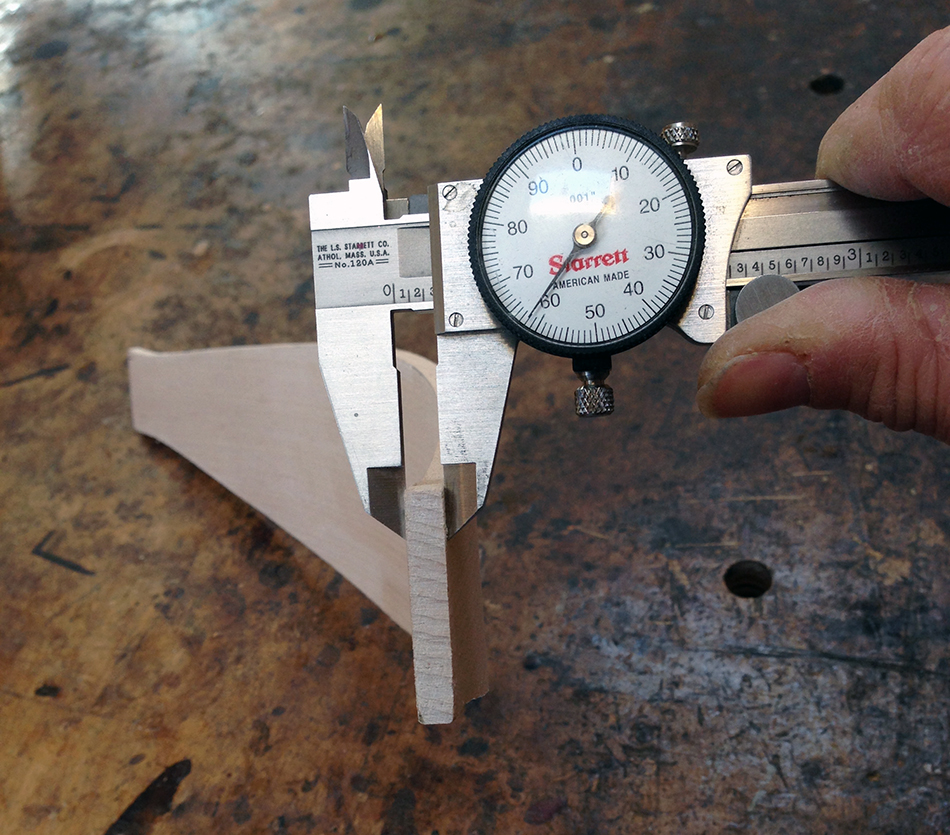
I always measure the tenon in four spots as indicated by the four Xs shown in the photo on the left. This tenon measured about .262″ on one side and about .265″ on the other. I work on the back of the slat since, because of it’s convex shape, it’s easier to shape. Using a small, sharp block plane I take thin, cross grain shavings feathering them in from the main body of the slat. I check my progress frequently in all four spots, especially in the beginning so I have a sense of how much material I am removing.

When I get within a few thousandths of an inch I begin to check the fit by seeing if the point of the tenon will slip into the mortise as shown below. I do not force the tenon in and I never push the tenon all the way in since that will damage the top and bottom ends of the mortise. If the tenon doesn’t fit I go back to the block plane and take a few more shavings. I am aiming for a snug fit that slides into the mortise without too much resistance. The goal is for good wood-to-wood contact over the entire surface of the tenon and mortise. I continue taking light shavings until both points of the tenon slide smoothly and snugly into the mortise.

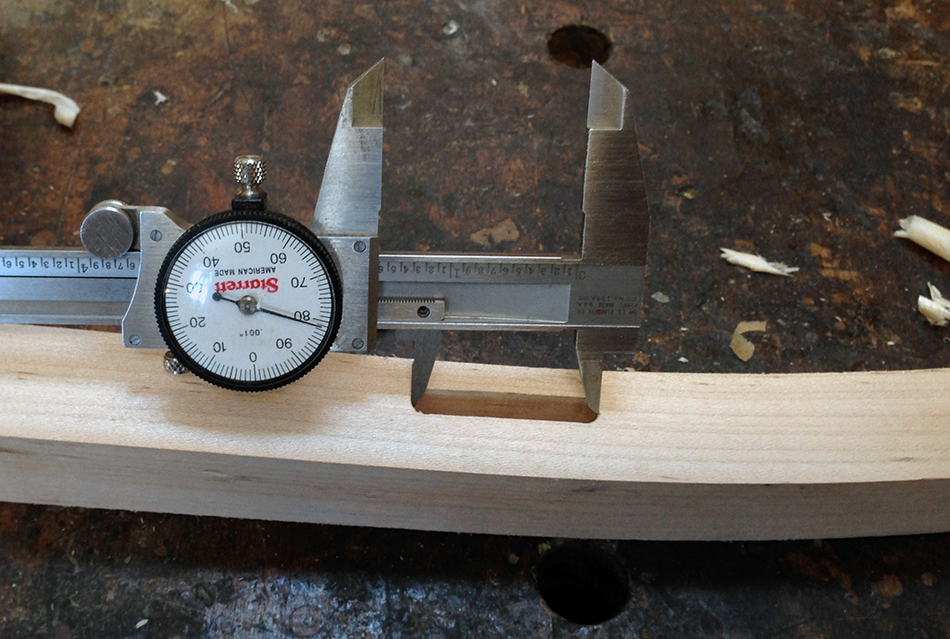
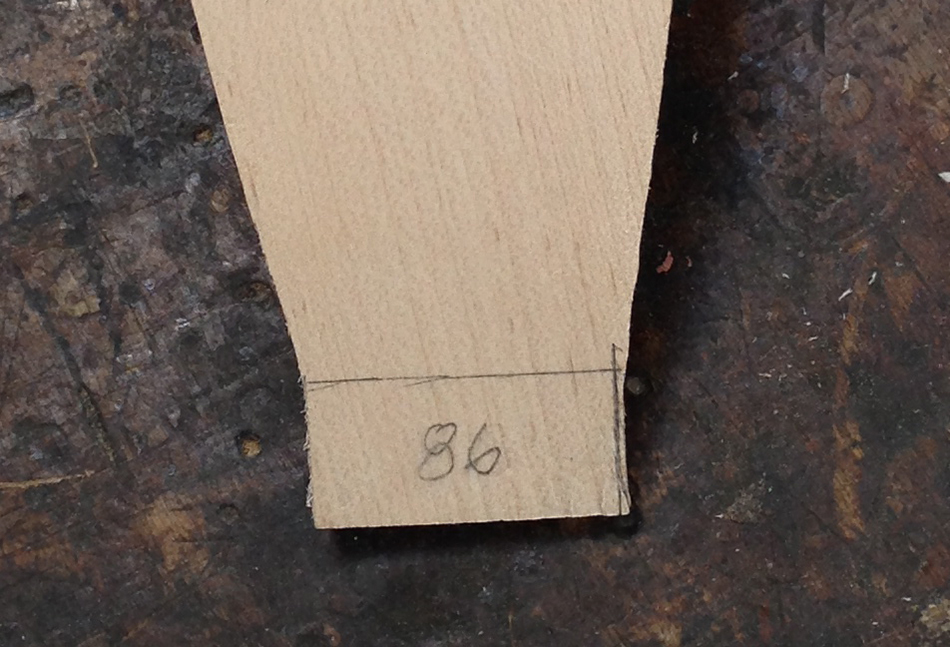
Next I measure the length of the mortise. Although both mortises for the top slat should be very close in length there can be small differences. I try to find the longest measurement I can from the very top part of each rounded end. This mortise measures 1.581″ in length. For an extra tight fit I will add 5 thousandths to the width of the tenon at the shoulder, or 1.586″.
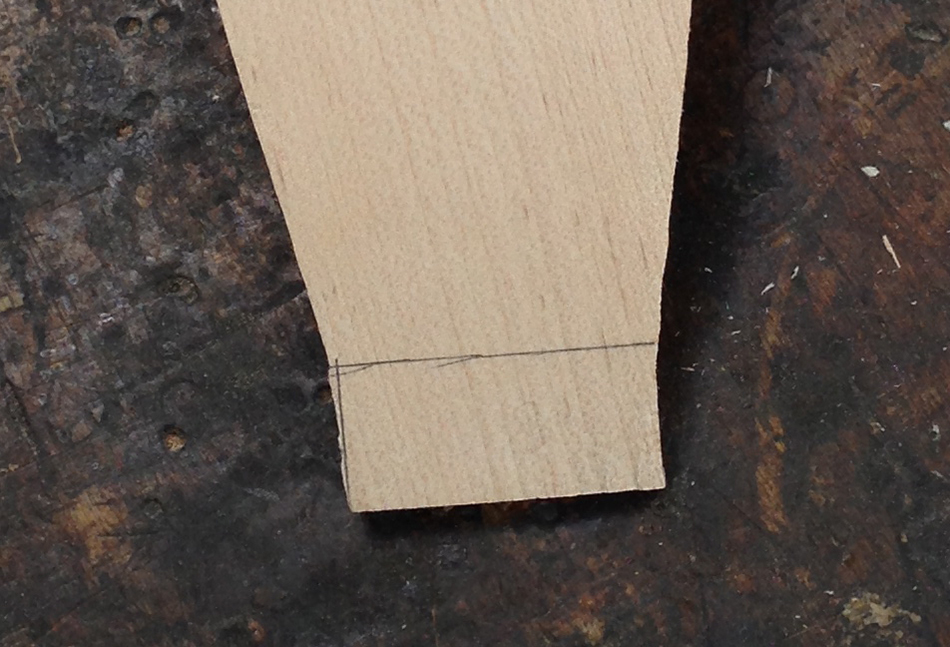
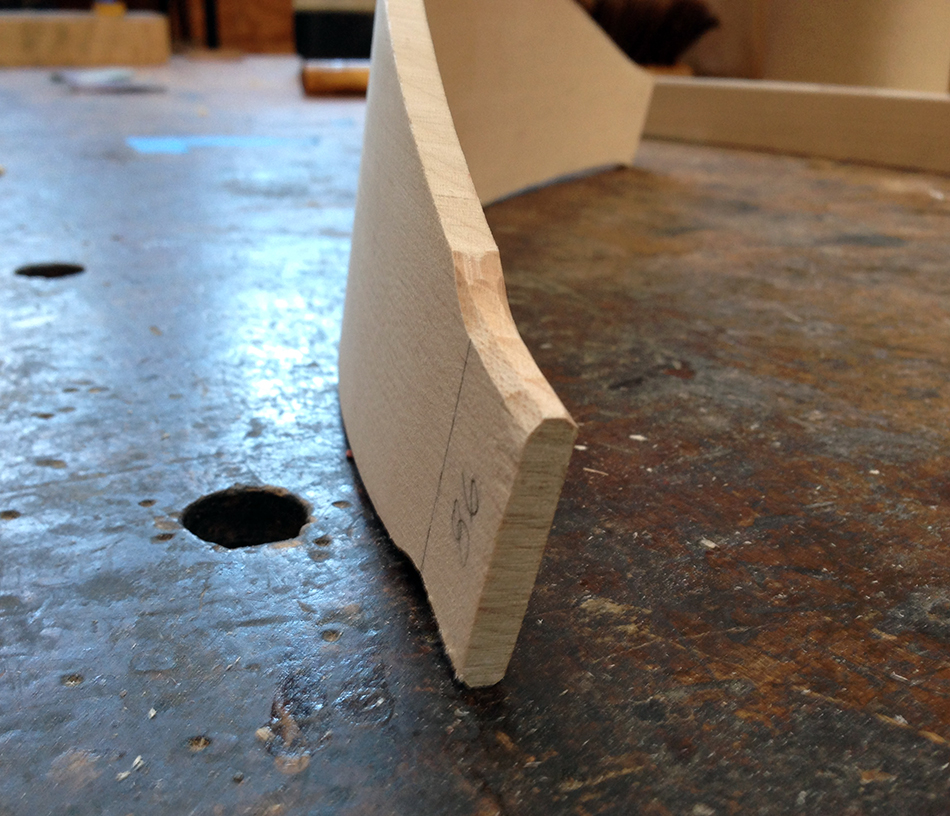
I always layout the tenon on the back of the slat. I begin by drawing the shoulder using a small square. For these slats the shoulder simply represents the point on the tenon that will align with the surface of the leg. There is no discernible change in thickness or step between the main body of the slat and the slat tenon. The shoulder line is parallel to, and 3/4″ away from the outside edge of the tenon. Next I draw a line perpendicular to the shoulder line as close to the bottom edge as possible. You can see this line on the left side of the tenon. I begin shaping by removing all the material on the bottom edge of the tenon that is outside the line. I like to use a rasp for this part of the process since, because of grain direction, the bottom edge tends to chip when cut with a knife.
Once the bottom edge is straight and square I need to mark the top edge of the tenon. I set the caliper to the exact measurement I want — 1.586″ — and lock it in place. Then I mark the top edge of the tenon. I also like to write the length of the tenon on the slat to remind me of the measurement I’m aiming for. I only really need the last two digits, in this case 86.
Here you can see that the bottom edge (on the left) is straight and square and the top edge is marked for shaping. Another thing to notice is that the main body of the slat tapers into the straight, bottom edge of the tenon — there is not an abrupt change in direction at the shoulder. Now I am ready to shape the top edge of the tenon. I generally use a carving knife for this. My favorite is the regular Slojd knife from Pinewood Forge.
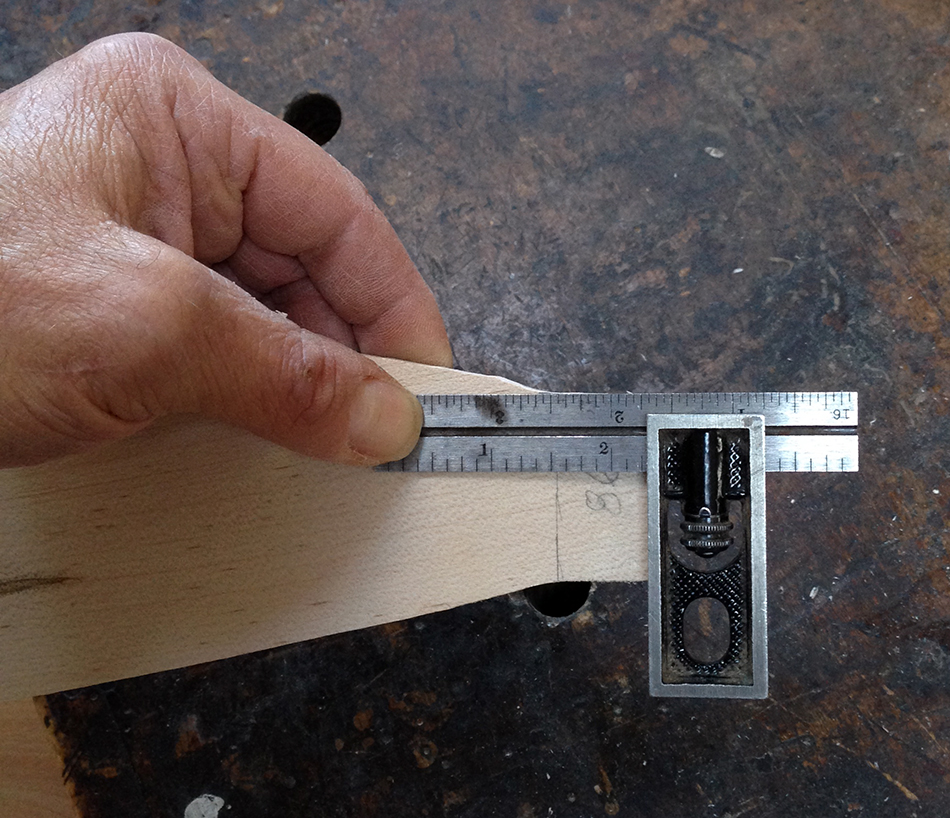
The top edge (on the right) has been shaped and is straight and square and the main body of the slat tapers to the shoulder line. The measurement at the shoulder line is exactly 1.586″.

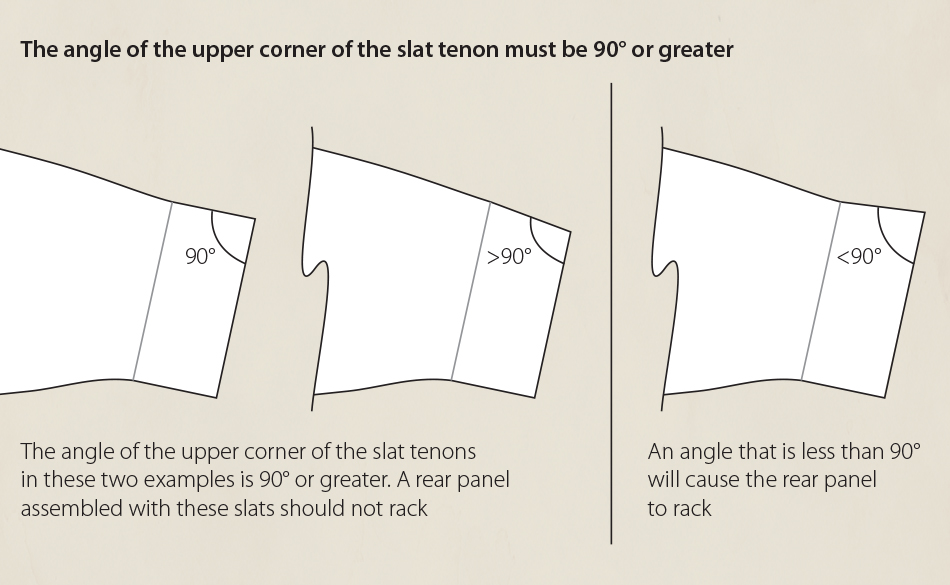
The final thing to check is to make sure that the top edge of the tenon meets the outside edge at an angle of 90° or more. I check this by placing a square firmly against the outside edge of the tenon and in-line with the point where top edge of the tenon intersects with the shoulder line. If any part of the top edge of the tenon is visible above the square it must be removed.
This illustration shows two acceptable tenons on the left, one with an upper corner angle of 90° and the other with an upper corner angle that is greater than 90°. Both these tenons will work fine and an assembled rear panel will be symmetrical when assembled. The tenon on the right has an upper corner angle that is less than 90°. This tenon must be reshaped until the upper corner angle is 90° or more. The problem that occurs when the angle is less than 90° is that the entire body of the slat will be kicked downward causing the rear panel to be racked. In this case there is no way to make the rear panel symmetrical, except to reshape the upper edge of the tenon.
The final shaping task is to chamfer the top and bottom edges of the tenon so that they look like half of an octagon, being sure to feather in the chamfer from the main body of the slat. This half octagon shape roughly approximates the shape of the round ends of the mortise. When the tenon is inserted into the mortise it will pinch and deform the round corners making for a very tight fit.
Again, the goal is to have the tenon fit perfectly into the mortise the first time it is dry fit. Here is a view of the back of the slat. The black line that you see is not a gap, but the pencil line indicating the shoulder.

And here is a view of the front of the slat. As you can see it’s a very tight fit with no gaps.

I really like the precision and methodical nature of this process. Although it may seem finicky, the results are definitely worth the effort. And, once you get used to the process it goes very quickly.
In the next post I will finish fitting the slats to the rear legs. The process involves not only fitting each tenon to it’s mortise as shown above, but also evaluating and adjusting the overall relationship of all the parts that make up the rear panel — legs, slats and rungs — so that they come together as expected at assembly time.
Jeff Lefkowitz
Side Chair Build Series Links:
- Next Post: Fitting Slats, Part 4
- Previous Post: Fitting Slats, Part 2